Use Claude Code for Free with FreeLLMAPI: Beginner Setup Guide
Run Claude Code on free AI models. Install FreeLLMAPI, add free provider keys, and connect Claude Code in about 20 minutes, step by step.
This is the full setup from the reel, starting from zero. You don’t need to know what an “API” or a “proxy” is; I explain each piece when we get to it.
It takes about 20 minutes and costs nothing. You need a Mac, Windows, or Linux computer and an internet connection.
What you’re building
Claude Code is Anthropic’s coding assistant. It runs in your terminal, reads your project, and writes code for you. Normally it talks to Anthropic’s paid Claude models.
FreeLLMAPI is a open-source program (MIT license, 31k+ GitHub stars) that you run on your own computer. It collects the free tiers from many AI companies (Google, Groq, Cerebras, OpenRouter, Mistral, NVIDIA and more) and puts them all behind one address on your machine: http://localhost:3001.
So the setup looks like this:
Claude Code → FreeLLMAPI (on your computer) → free models from 34 providers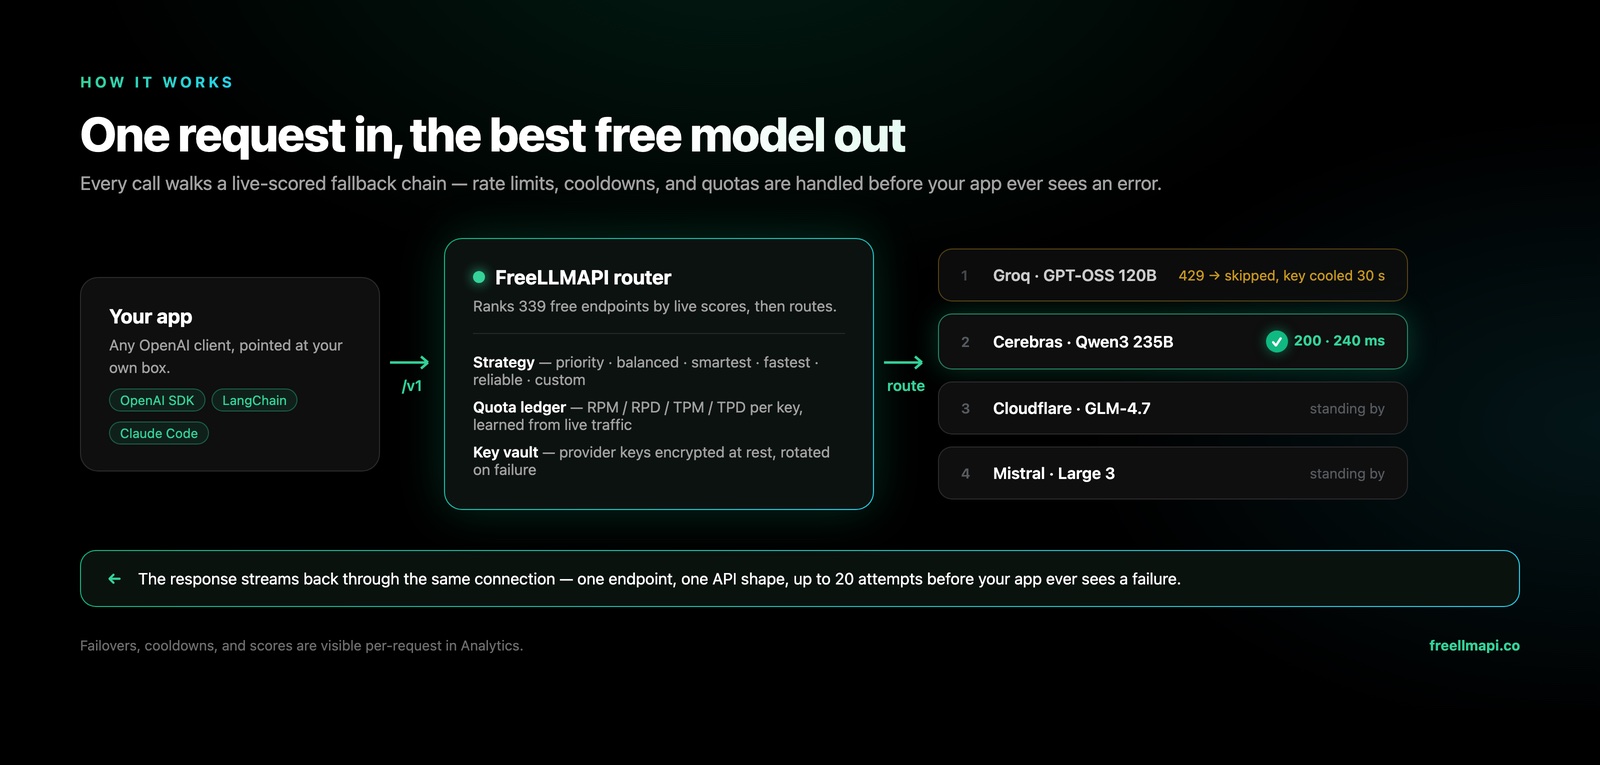
When one provider’s free limit runs out, FreeLLMAPI switches to the next one by itself. The project counts roughly 7.4 billion free tokens a month across 635 free model endpoints. A token is a small chunk of text, about ¾ of a word.
Before you start: the honest catch
- You won’t be using Anthropic’s Claude models. Claude Code is only the tool; the answers come from free models like Gemini, Llama, Qwen or DeepSeek. The FreeLLMAPI README lists the trade-offs itself: “no frontier models, variable latency, no SLA.”
- Quality changes during the day. The best free models hit their daily caps first, so answers get weaker late in the day until the limits reset at midnight UTC (5 AM in Pakistan).
- It’s meant for learning and personal projects. The project’s disclaimer says to switch to a paid API before you ship anything real, and each provider’s terms of service still apply to you.
Step 1: Install FreeLLMAPI
Pick the option that matches your computer. If you’ve never used a terminal, take the desktop app.
Option A: Desktop app (Mac or Windows)
- Open the FreeLLMAPI releases page.
- Scroll down to Assets and download the right file:
- Mac with Apple chip (M1, M2, M3, M4): the
.dmgwitharm64in the name. - Older Intel Mac: the
.dmgwithx64in the name. - Windows: the
.exeinstaller.
- Mac with Apple chip (M1, M2, M3, M4): the
- Install it like any other app and open it. A small icon appears in your menu bar (Mac) or system tray (Windows).
The desktop app has no username or password to set up; it signs you in on its own.
Not sure which Mac you have? Click the Apple logo → About This Mac. If it says “Chip: Apple M…”, pick
arm64.
Option B: Docker one-liner (Mac, Linux, or Windows with WSL)
Use this if you already have Docker Desktop installed and running. Open your terminal and paste:
curl -fsSL https://freellmapi.co/install.sh | bashThe script creates a ~/freellmapi folder, generates an encryption key for your API keys, and starts FreeLLMAPI. Running it again later is safe, and it’s also how you update.
This version has a dashboard login, so you’ll create an email and password the first time you open it. The account belongs to your own install.
Check that it worked
Open http://localhost:3001 in your browser. With the desktop app you can also click the tray icon and choose Open Dashboard. If the FreeLLMAPI dashboard loads, you’re done with Step 1.
Step 2: Get free API keys from a few providers
FreeLLMAPI has no AI models of its own. You give it free keys from AI companies and it uses them for you. An API key works like a password that lets a program use a service on your behalf.
You don’t need all 34 providers. These four are listed in the FreeLLMAPI README, and each needs only a free account:
| Provider | Where to get the key |
|---|---|
| Google AI Studio | aistudio.google.com/apikey |
| Groq | console.groq.com/keys |
| Cerebras | cloud.cerebras.ai |
| OpenRouter | openrouter.ai/keys |
For each one:
- Create an account.
- Open the key page from the table above and create a new key.
- Copy the key and keep the tab open. You’ll paste it in the next step.
Keep your keys private. Never post them in screenshots, comments, or GitHub. If one leaks, delete it on the provider’s site and create a new one.
Step 3: Add your keys to FreeLLMAPI
- In the FreeLLMAPI dashboard, open the Keys page.
- Add each key you copied and choose the matching provider.
- Check the status dot next to each key. FreeLLMAPI health-checks keys itself, so a bad paste shows up here.
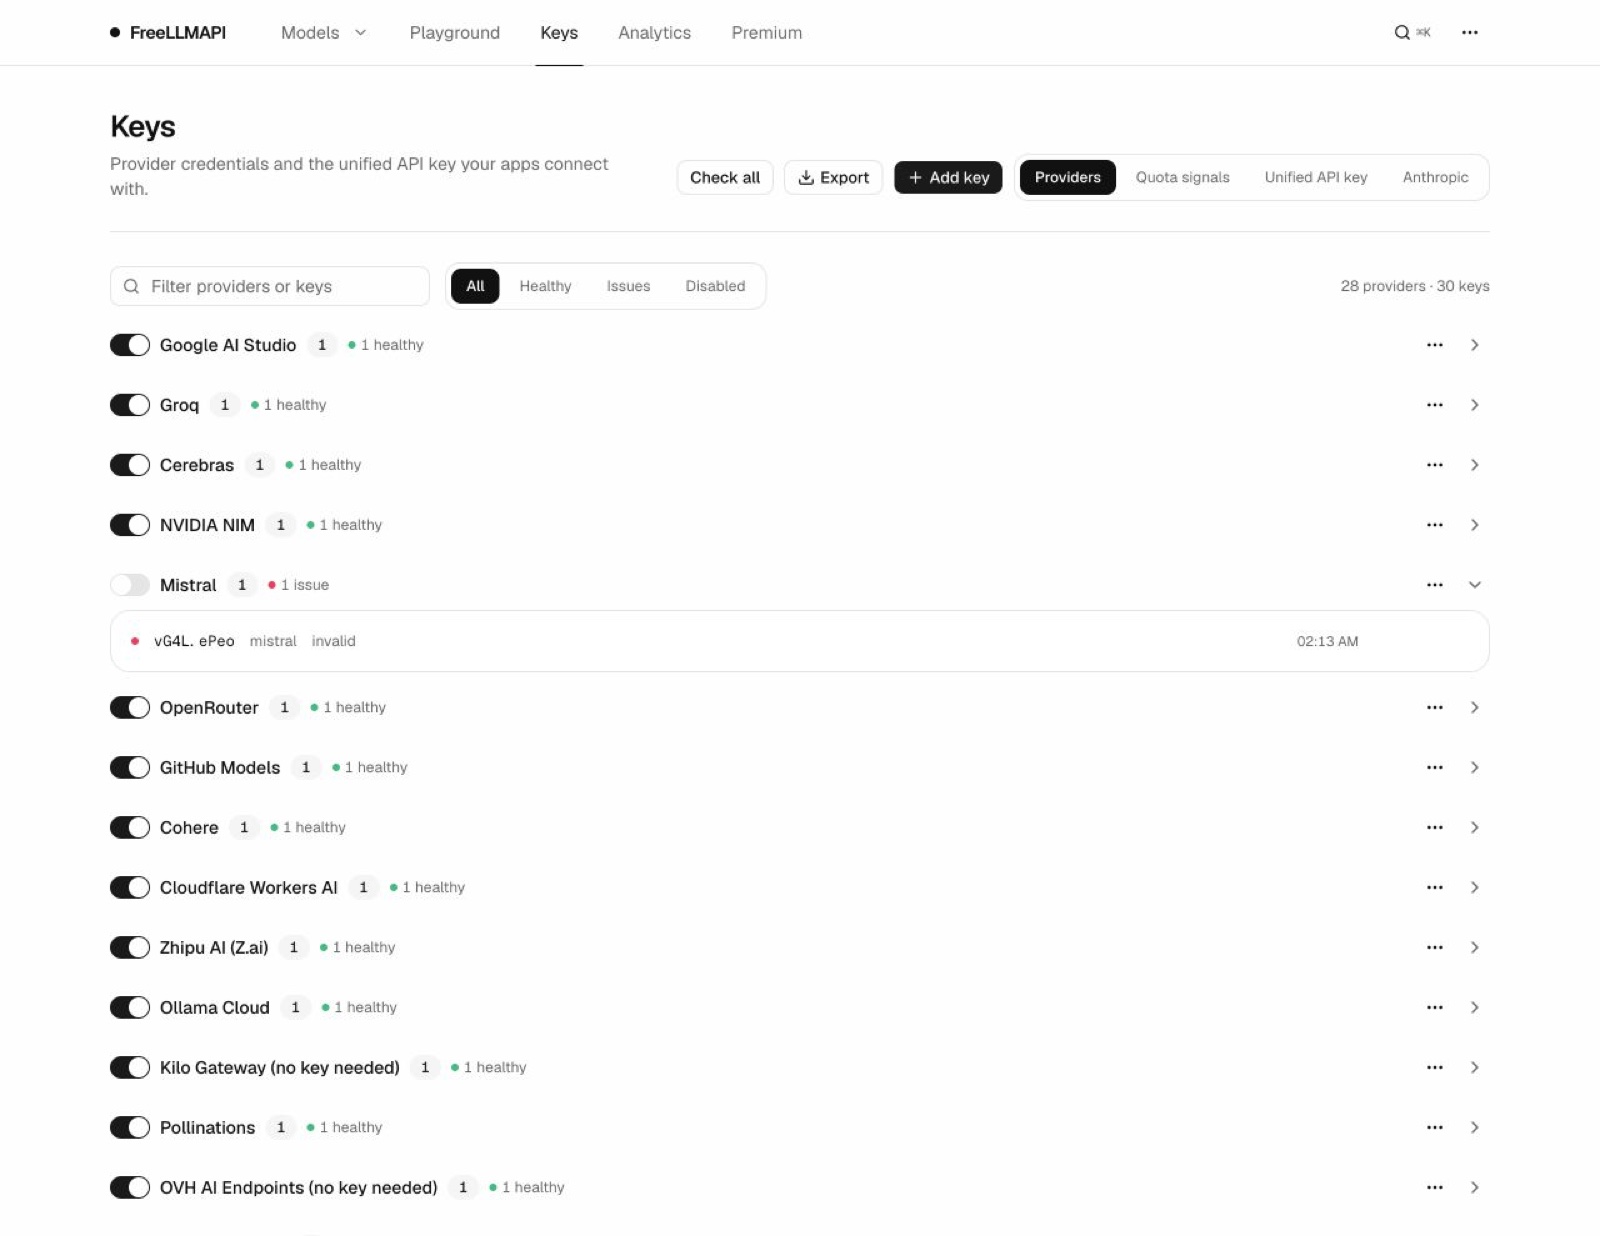
The keys are stored encrypted (AES-256-GCM) in a local database on your computer, and your apps never see them.
At the top of the Keys page is your unified API key, starting with freellmapi-. Claude Code uses this single key to reach every provider you added. Copy it.
Desktop app shortcut: click the tray icon, then Copy Key.
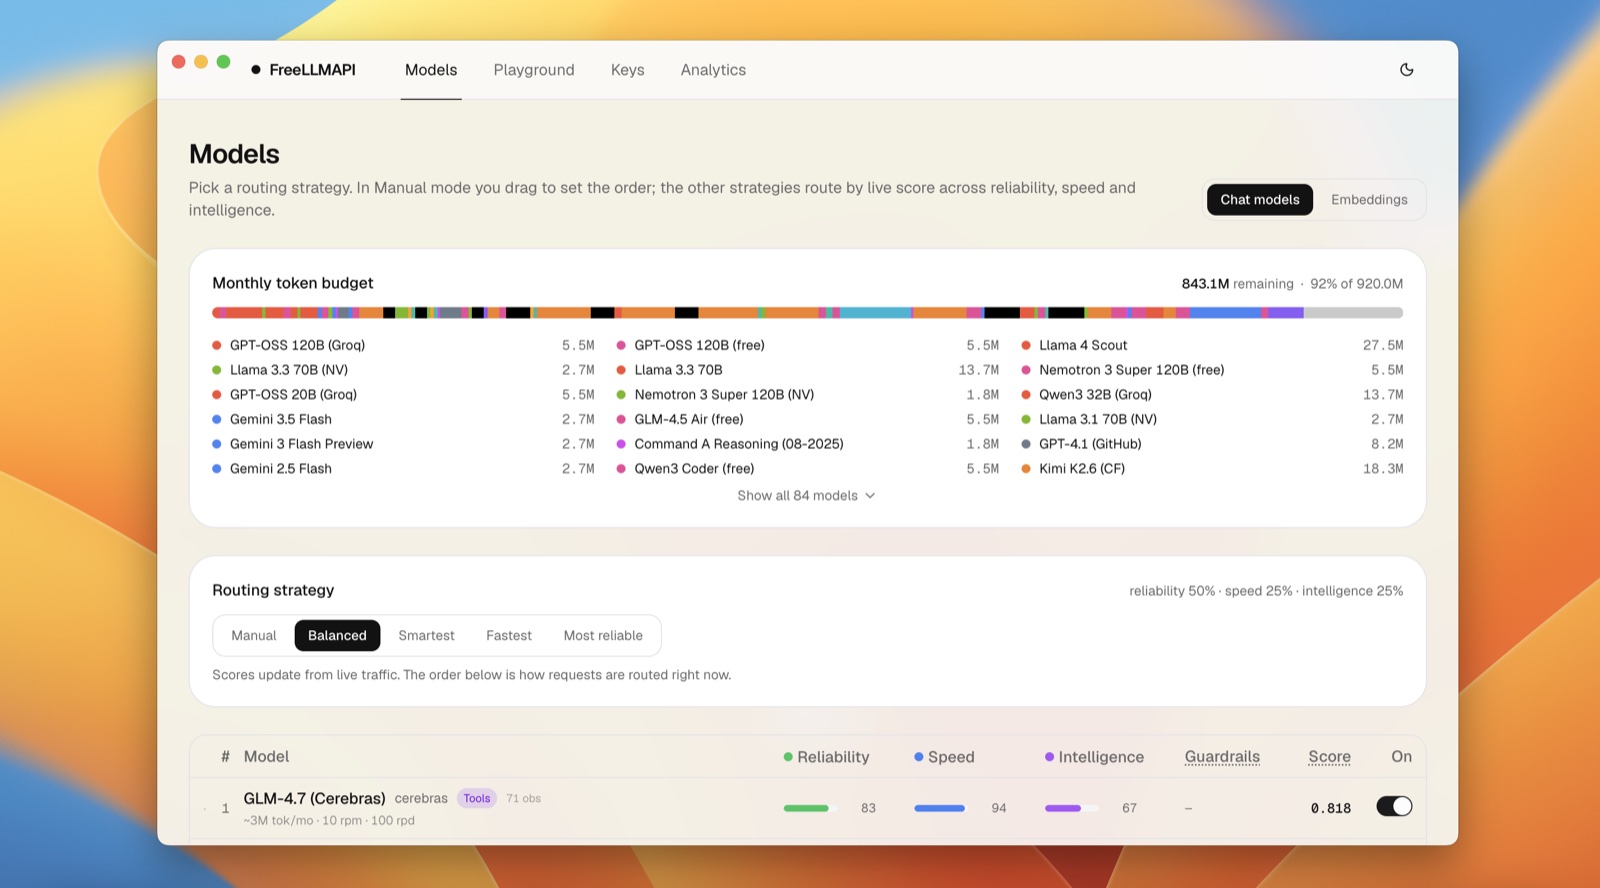
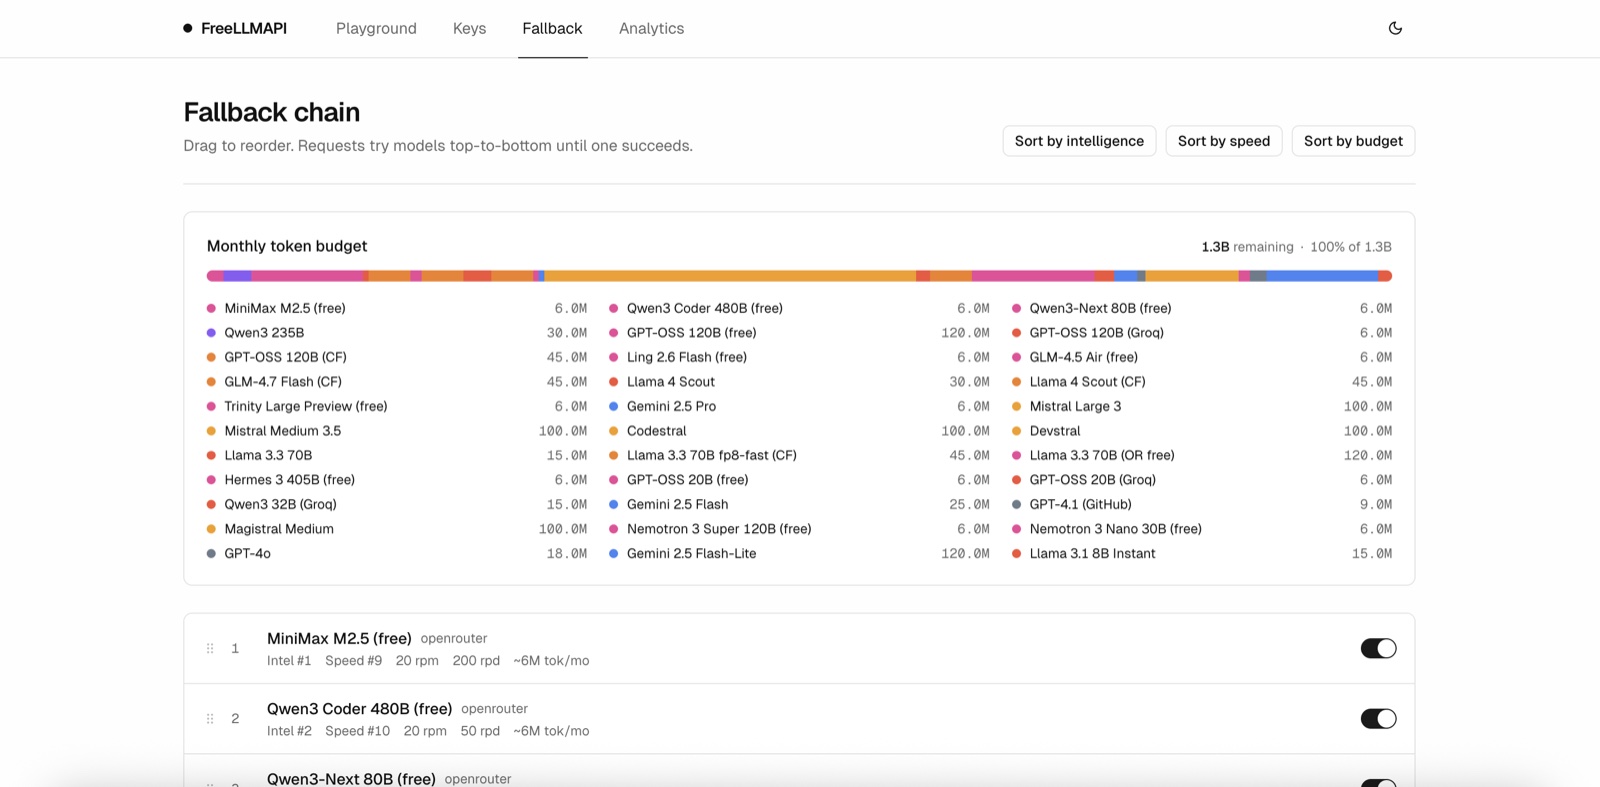
Optionally, open the Fallback Chain and reorder it. FreeLLMAPI tries models from the top and moves down the list when one hits its limit.
Step 4: Install Claude Code
If you already have Claude Code, skip to Step 5.
Mac or Linux, in your terminal:
curl -fsSL https://claude.ai/install.sh | bashWindows, in PowerShell:
irm https://claude.ai/install.ps1 | iexBoth commands come from Anthropic’s setup docs. If your terminal can’t find claude afterwards, close it and open a new one.
The next step uses npx, which needs Node.js 20 or newer. Check with node --version. If you get “command not found”, install the LTS version from nodejs.org.
Step 5: Connect Claude Code to FreeLLMAPI
FreeLLMAPI ships a small command-line helper that makes the connection. You can use it two ways.
Way 1: launch Claude Code through FreeLLMAPI (recommended)
export FREELLMAPI_API_KEY=freellmapi-your-unified-key
npx freellmapi launch
Replace freellmapi-your-unified-key with the key you copied in Step 3. On Windows PowerShell, the first line is $env:FREELLMAPI_API_KEY="freellmapi-your-unified-key".
launch starts Claude Code with the connection details passed in for that session only. It writes nothing to your config files, so your normal Claude Code setup stays as it was.
Way 2: save the setup permanently
If you want plain claude to always use FreeLLMAPI, run the setup command. Start with a dry run, which prints the exact changes and writes nothing:
npx freellmapi setup-claude --url http://localhost:3001 --api-key freellmapi-your-unified-key --dry-runIf the changes look right, run it again without --dry-run:
npx freellmapi setup-claude --url http://localhost:3001 --api-key freellmapi-your-unified-keyIt merges into your existing Claude Code settings and makes a timestamped backup first, so you can go back.
Common mistake: for Claude Code the address is
http://localhost:3001with no/v1on the end. Cline, Aider and Codex use/v1; Claude Code doesn’t.
Step 6: Test it
Open a project folder in your terminal and start Claude Code (with npx freellmapi launch from Way 1, or plain claude if you used Way 2). Ask it something simple:
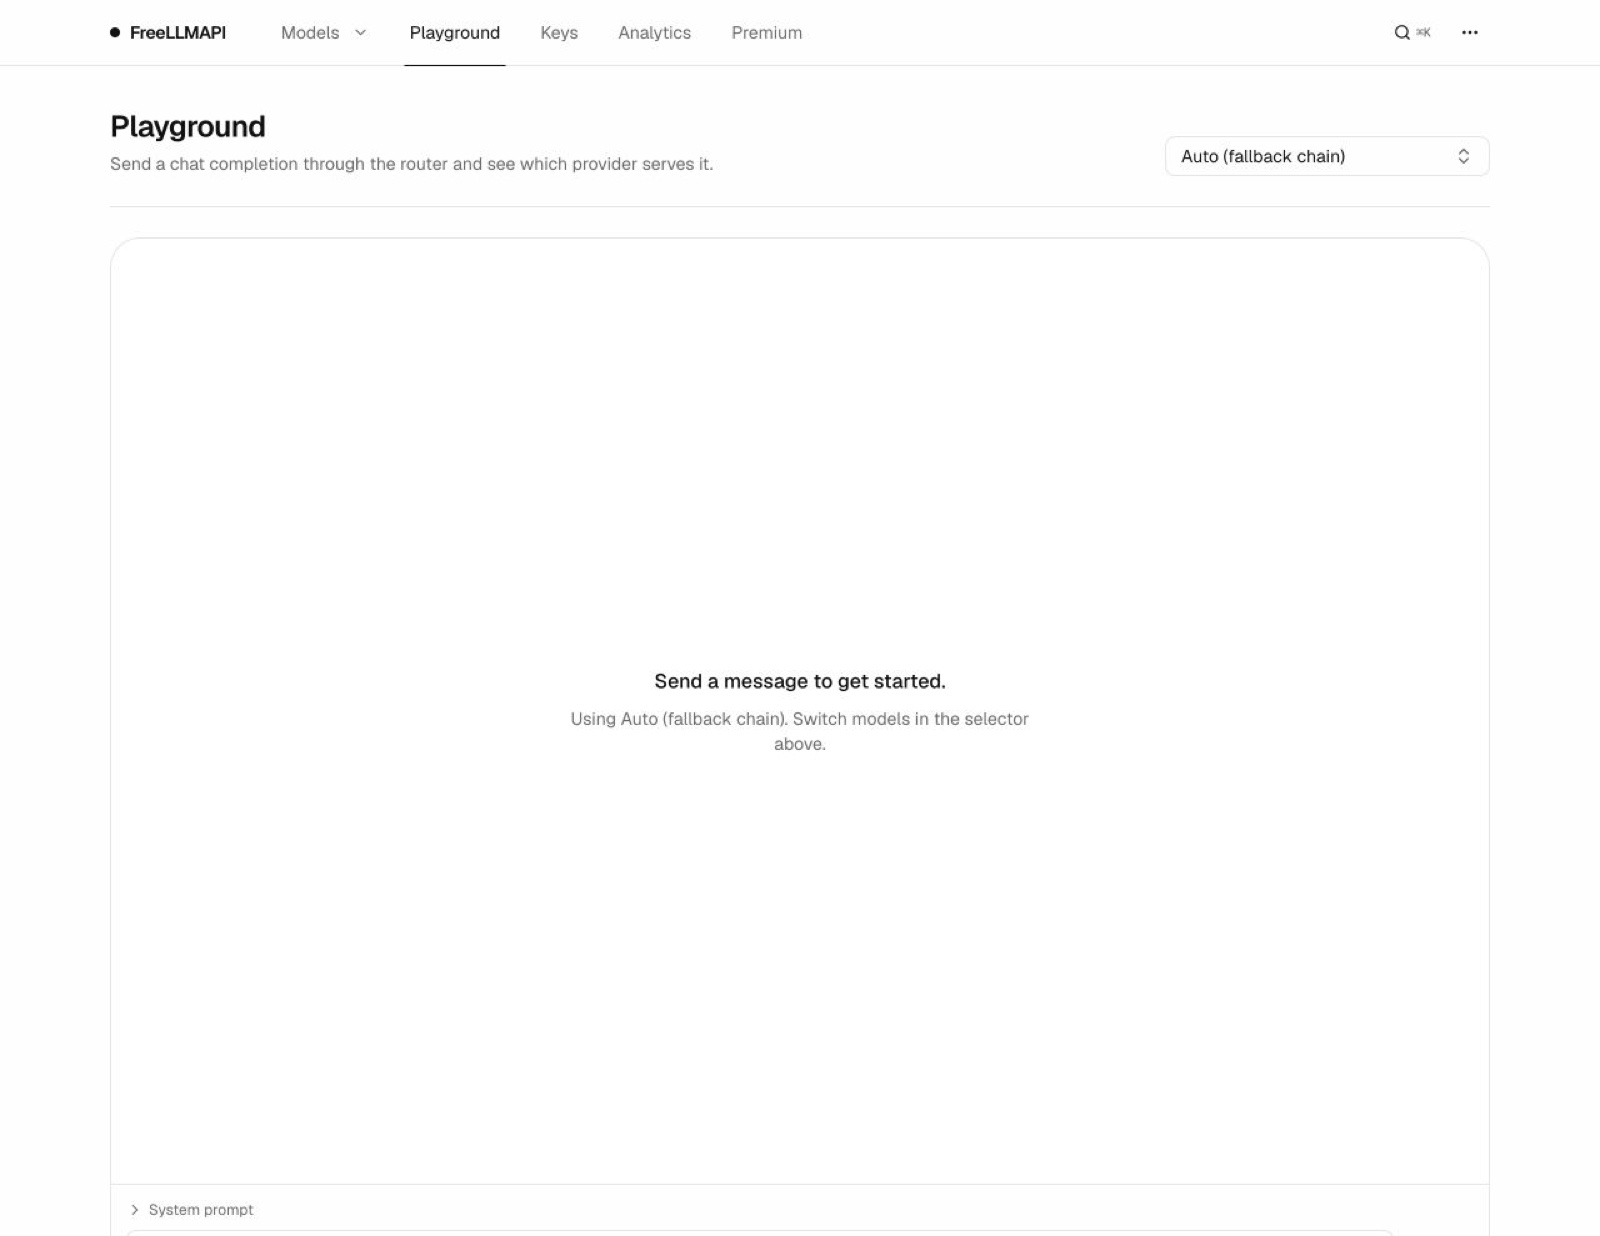
Explain what this project does in 3 bullet points.Then open the Analytics page in the FreeLLMAPI dashboard. If the request count went up, Claude Code is talking to FreeLLMAPI. The Playground page is useful too: send a message there and it shows which provider and model answered.
Troubleshooting
Claude Code says “connection refused”
FreeLLMAPI isn’t running. Open the desktop app, or start Docker Desktop and run the install command again.
Every request fails
Your provider keys are probably wrong or not saved. Check the status dots on the Keys page and re-paste any key that shows an error.
Answers got worse in the evening
The strongest free models used up their daily caps, so FreeLLMAPI fell back to smaller ones. Limits reset at midnight UTC. Keys from more providers give the router more models to fall back on.
I forgot the dashboard password (Docker install)
Click Forgot password? on the login page. There’s no email; the reset code is printed in the server log. Run docker compose logs -f freellmapi to find it. The code works for 15 minutes.
What else you can do with it
The same unified key works with Codex CLI, Cline, Aider, Continue, OpenCode, Cursor, and any app that accepts an “OpenAI-compatible” address. npx freellmapi list prints the supported tools with their addresses.
The current list of free models and their limits is at freellmapi.co/models.
Quick recap
- Install FreeLLMAPI (desktop app or Docker).
- Get free keys from Google AI Studio, Groq, Cerebras and OpenRouter.
- Add them on the Keys page and copy your unified
freellmapi-key. - Install Claude Code.
- Run
npx freellmapi launch.